Yamaha "Street Scrambler" Engine Upgrade

 We have been enjoying upgrading this engine to a 230cc, along with a hot cam and other necessary modification to really bring this little street scrambler to life!

All engine covers have been coated in a lovely bronze, whilst the main engine assembly will be a gloss black!


J


Engines in Our project History. ....Please click here to see the list

 Over the past 30 years we have accrued quite a variety of engines on which we have carried out major work, (often multiples of the same type of engine) most are complete rebuilds or reconstruction from a few rare parts. These include:


Amilcar

Albin Marine

Alvis Silver Eagle

Alvis Grey Lady

Aston Martin 15/98

AC

Austin 7

Austin 10

Austin A series

Apex Marine

Bentley WO

Bentley (Derby)

Bedford Commercial

Bristol / BMW 6cyl

BSA 250, 350, 650

Bultaco 350

Chrysler

C.I.M.E

Chevrolet SB

Citroen 5cv '20's

Coventry Climax

Daimler Sleeve Valve

De Haviland

Delage DIS

De Dion Bouton

De Dion (Jackson Dogcart)

DFP

Ford Model A

Ford 289

Ford T

Ford x flow (Formula Ford)

Ford V6

Humber 1914

Humber 6 '36

Harley Davidson J '22 - S/Hd '75

KTM MX 500

Lagonda 2L

Lagonda Meadows 6, LG

Lagonda V12

Lanchester 4

Land Rover

Lycoming

Lotus TC

Meadows 4

Meadows 6

Mercedes '59

Morris 8

Morris Commercial Petrol '30

Morris A Series

Morris FFK Commercial Diesel

MG TC

MG PA

Napier

Osca

Peugeot 601 '36

Peugeot 401 '30s

Rolls-Royce Small HP

Rolls-Royce PII

Rolls-Royce (Aero)

Renault '34

Salmson (Aero)

Seagull Marine

Talbot 6 cyl

Triumph 6cyl '60/'70s

Triumph Tiger Cub

Triumph 500

Triumph 650

Weslake 500

Waukesha

Wolseley Hornet.


Eccentric Transport for Benjie the dog ....click to open

I have a great deal of work that I should be doing this weekend but sometimes it is fun to have a light hearted change..

 Every time I pop down to the beach or shops on my bicycle Benjie sulks and I feel bad!

 So I had a great inspiration, set about Jacob's old "tow along bike" that I made 15 years ago. A few minutes with the hacksaw gave me all the materials and then a little longer with the brazing torch and some internet inspiration and here we have the answer:


It works too, we had to reset the sidecar wheel to run more parallel with the frame and now I don't know its there as I pedal along on this old Raleigh.
We just need some coachwork next week end and Benjie will be off to the beach! 
Watch this space for an update..


Some Bits and pieces in our late summer workshop.... please click here to open fully


'30s Supecharged Wolseley Hornet, a million last painstaking jobs as we build this special from ground up.


Designs roughly put to paper, sometimes refined later in the evening, a must where stress calculations are necessary and sometimes created from the sketch alone.


Pre-War Peugeot. Conversion to shell bearings:

As with all modifications, we have to think of any consequences of changing the design of a mechanism. Whilst changing from white metal to thin wall shells from a later vehicle will be more practical for future builds of this engine, the cost is not any less than a full white metal replacement in this first instance.
These connecting rods have been converted many years ago and the whole engine was then stored. As as we build the engine we have to be very aware to make sure all is correct. We have had to machine and hand fettle the tang locations for the new shells. There is a small problem, as the housing mating surfaces go together they do not quite fully mate, the faces are fractionally out of true toward their edges. We now have to lap very carefully whilst keeping a watchful eye to maintain the housing tolerances within tenths of a thousandth of an inch. We mustn't forget to drill the tiny, timed oilway that feeds the cylinder bore for a very brief interval.. This is all very rewarding work, but terribly time consuming. We fettle a very small amount by filing the tang locations and lapping the face. We then apply Blue paste (similar to the use of a sooty flame in the gun making video elsewhere on this blog https://artinengineeringco.blogspot.com/2020/07/immerse-into-world-of-craftsman.html ) to the items, assemble, carefully torque together, strip, inspect and as necessary continue the process until all fit as near perfectly as possible. The whole meticulous process takes place under the vigil of an unforgiving ticking clock...


Standard Vanguard Solex Recovery. ...Please click here to open fully.


 Here we have carried out some recovery of the throttle butterfly shaft and of the worn carburettor housing. Machining the housing over size to accept an aluminium sleeve and new inner bronze sleeves as well as machine the shaft to suit. Finally all is line reamed and fettled to operate smoothly.

Mid 30's Supercharged Wolseley Hornet Special Build.... please click here to open

For a long time I have been involved in building this Wolseley into a special competition car. We have made very many bespoke items. Whilst I don't think I can post retrospective photos, here are some more photos as we move forward.
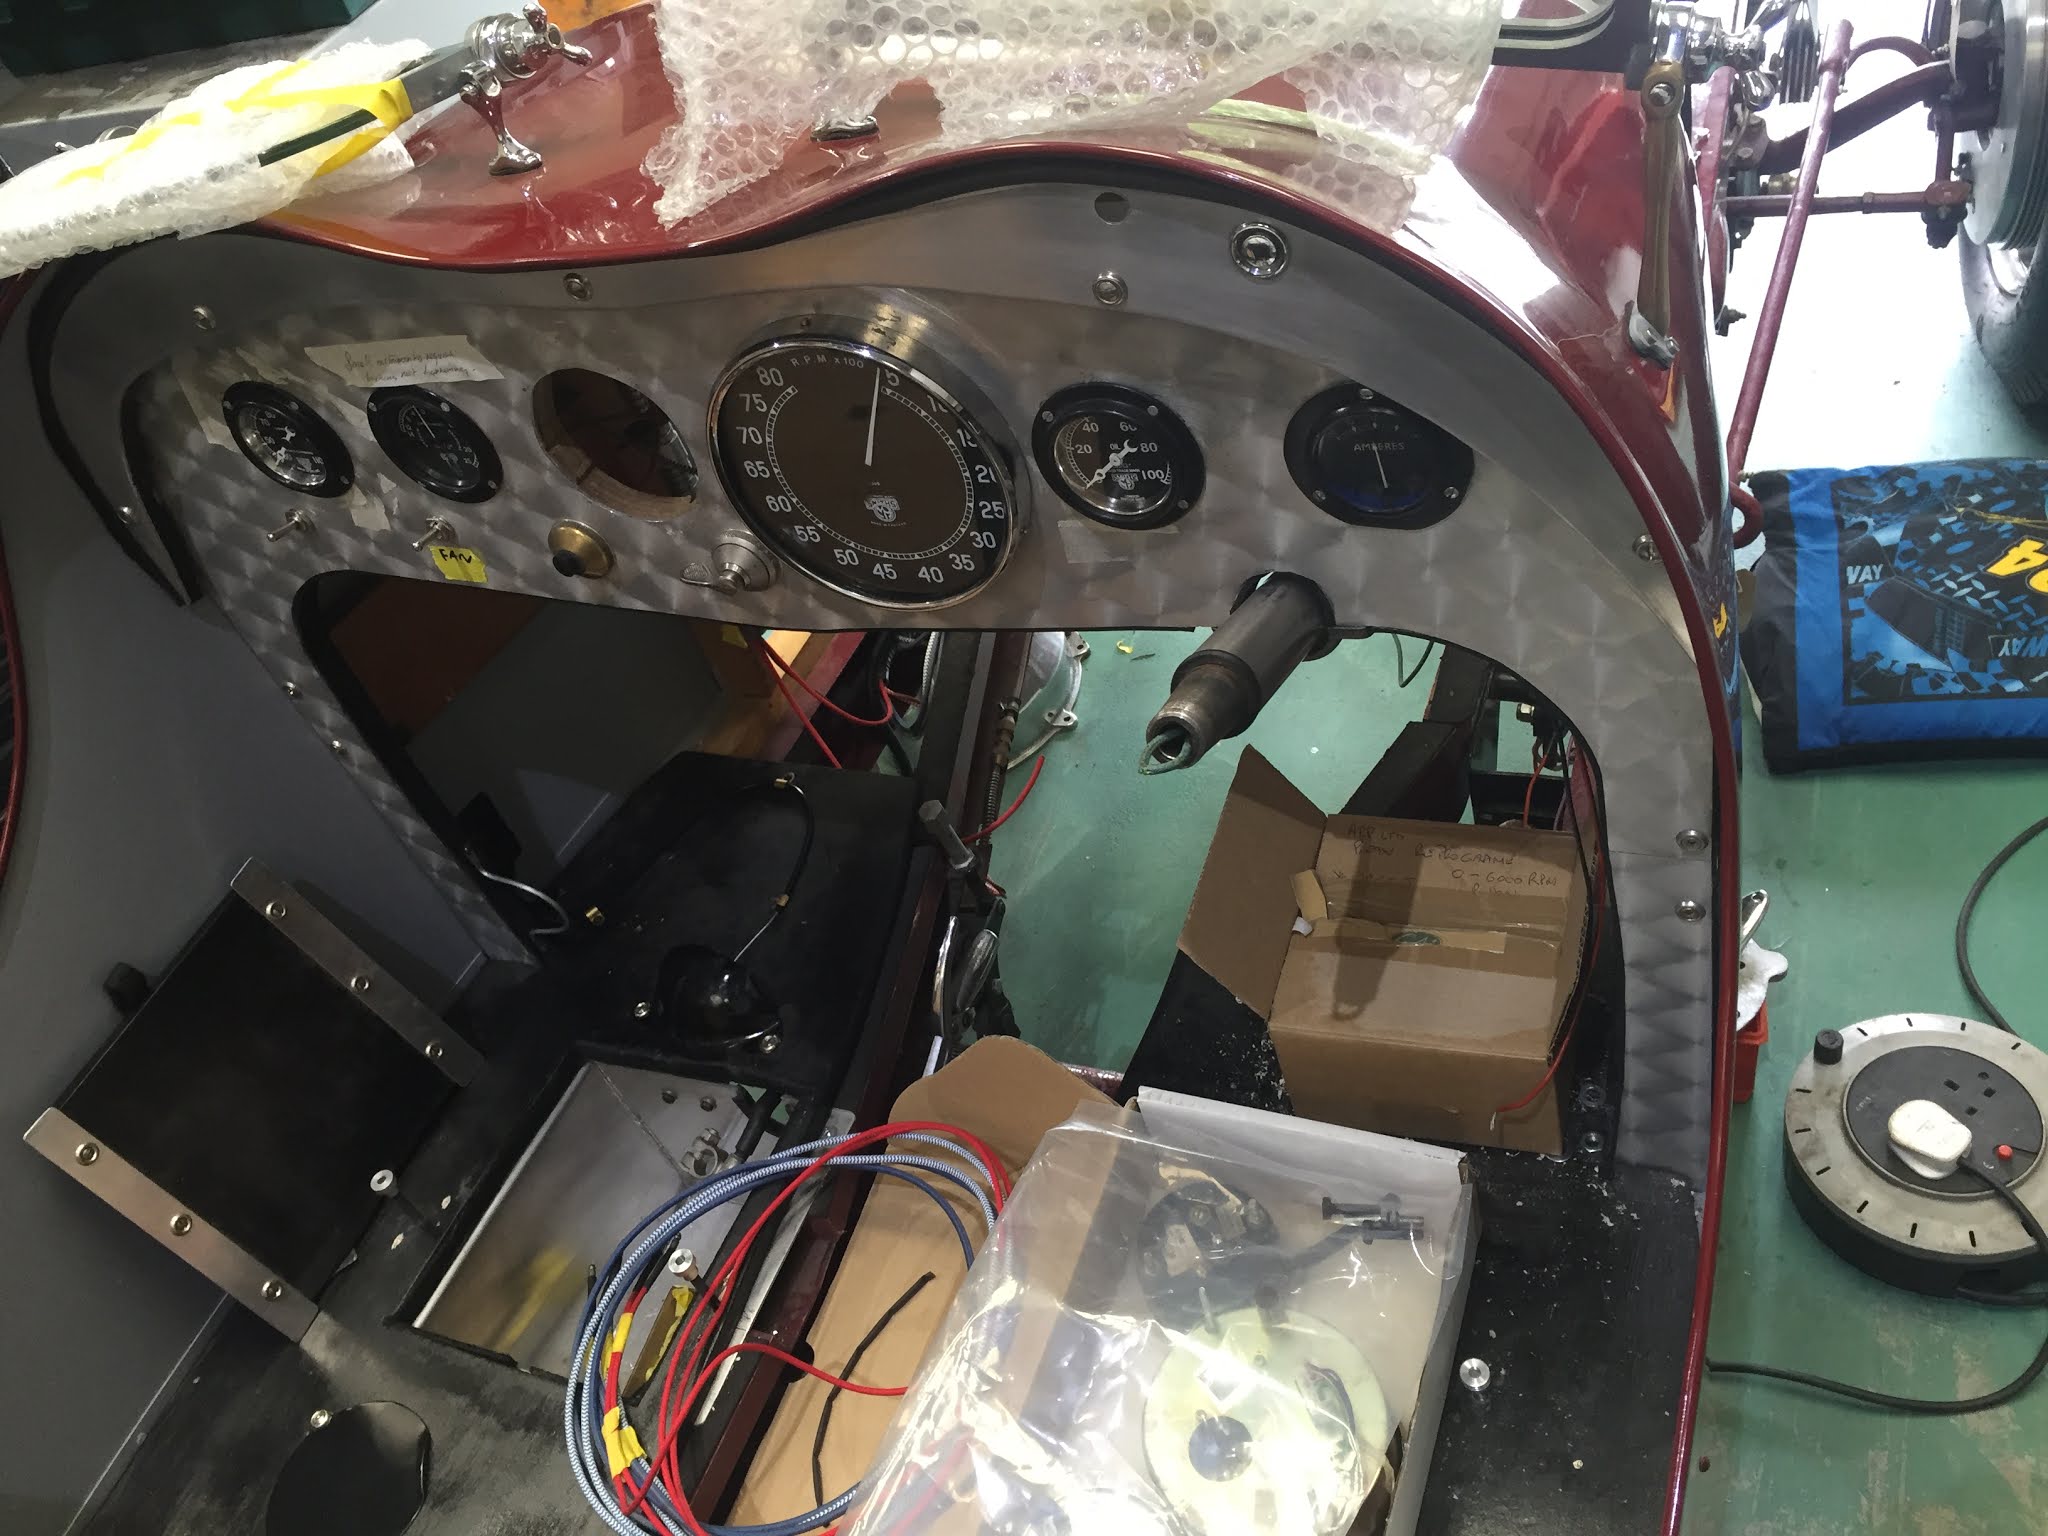
As you can see, we are set up and working toward a brief initial engine run in the workshop, this will be very brief to allow us to return to the various skew drives and other areas to visually inspect and ensure that all is well, especially in the way that they mesh together as there are so many new items that have never run with the old before. We have already "blued" with engineers blue to check the witness of engagement. We have also pressurised the oil system to prime and to check for vital leaks prior to fitting the sump. This is an incredibly effective way to illustrate any defects, including excessive clearance in new engine bearings and reground cranks.... it is all too easy to misread a micrometer despite checking many times.


With the aid of a Triumph fuel tank we have set up in preparation for a brief run.


I had initially used a section of Nylon to make an extended width chain tensioner but this was a little too thick and unforgiving, here I am riveting a section of suitable grade Tufnol onto the original tensioner. The extra width is to accommodate a duplex timing chain drive upgrade.


Smooth engagement of the oil pump was hindered by these old burrs on the coupling spline. Time for the oilstone and needle file.


The skew mechanism with the new skew gear in bronze. We have to ensure all is aligned in the brief engine run, If all ok I can drill, ream and taper pin to secure. Note the engineer's blue to provide an initial engagement witness. The steel driving gear is also new to suit.


Always be aware of raddii clearance... never take them for granted!


Here we had a small oil weep, I am checking that the assembly is now centralised and nipping the gasket. I had to carry out a metal spray repair around the cast iron inner boss and have to leave a small fillet, I have to make sure the gaskets have a sufficient diameter bore to clear the fillet and not hold off and allow the joint to weep. As you can see, we made a sleeve to help the repair from the inside. We also had to make a new shaft coupling spade, including milling a corresponding slot to allow the spade to engage and bronze weld into position.

Supercharger Adaptation Continued.

 Some more Supercharger drive over the last two weeks. All very time consuming as the clock races as if supercharged toward Christmas!