Honda TRX 500 FE

An unusual and quite modern project for us: The recovery of this agricultural quad engine which has an awful lot of parts for a 500cc single as a result of multiple clutches and low ratios etc.

It had suffered a catastrophic piston failure, leaving debris everywhere! The time taken is a surprising 70 + hours, despite just doing the bare minimum including fitting a good used crankshaft.

Honda's engineering is excellent, everything fits perfectly, even the interchanged parts.


Wolseley Hornet supercharged spl. Some more photos.

The front is off simply to allow access to see the mesh of the new timing gears during initial runs. Although we may have a slight back track for a good reason .... More to follow!


What have we been up to through summer? Here is a brief photographic update!

 In the workshop:

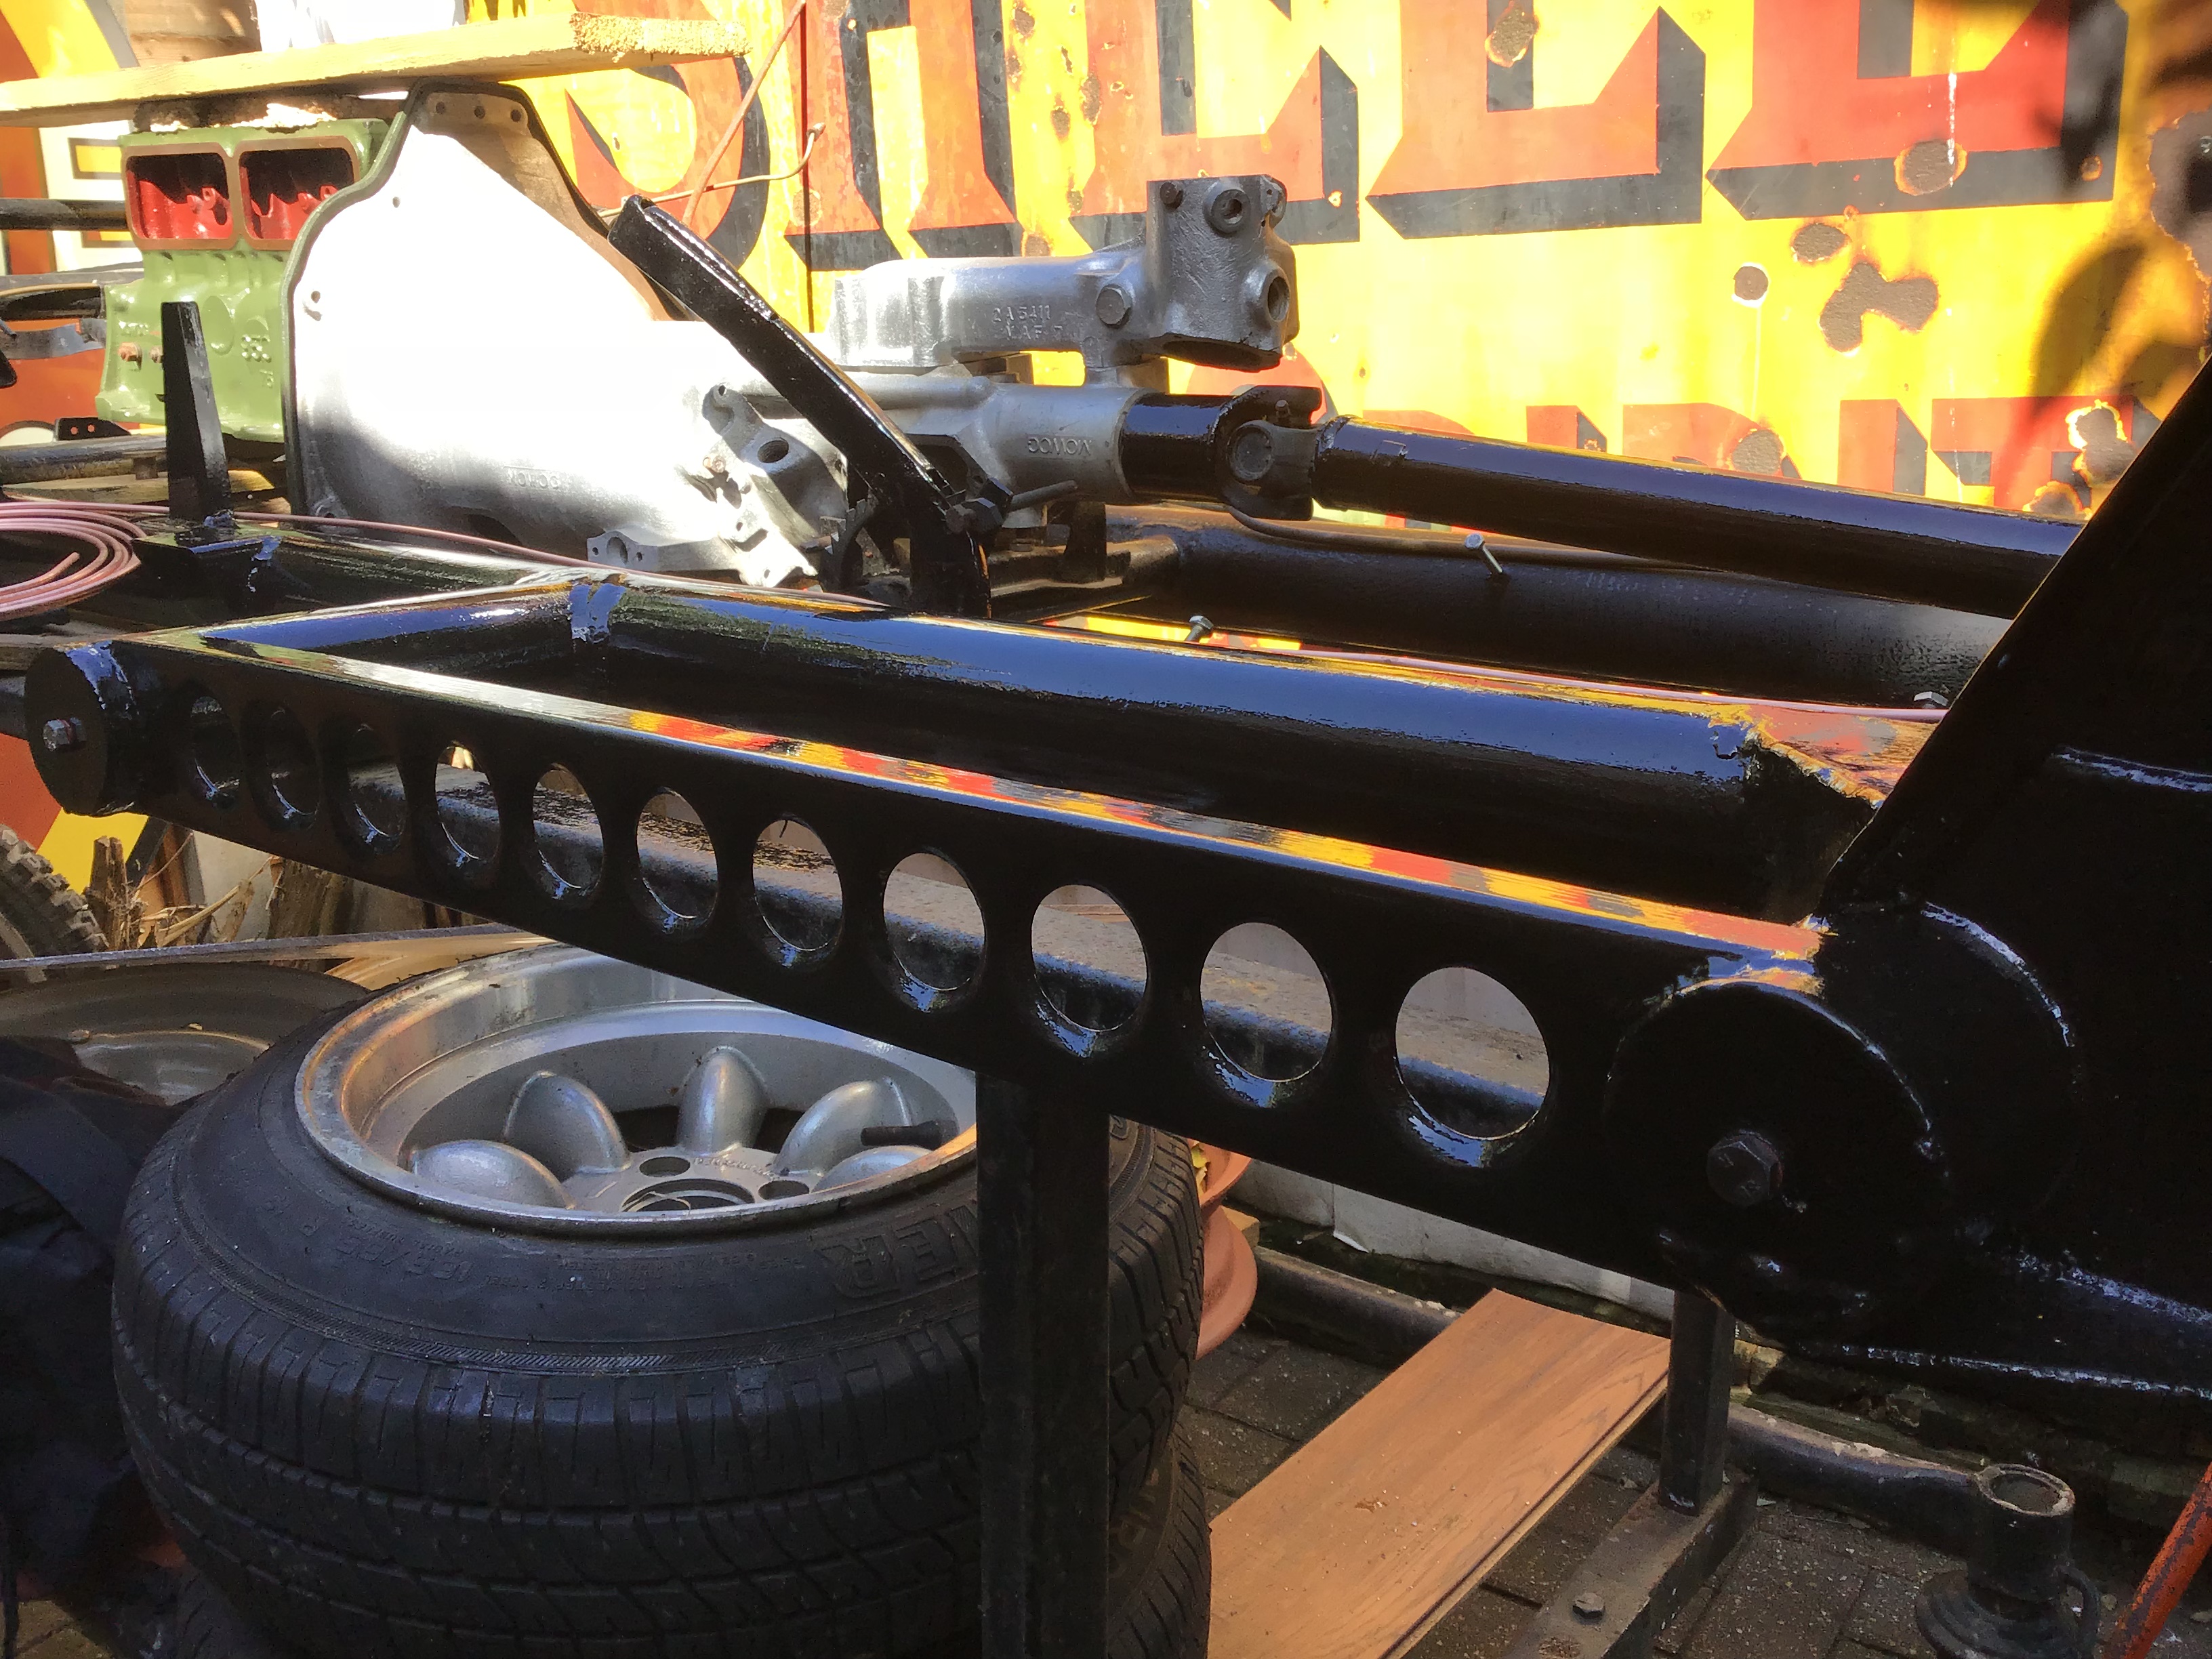
1930s Wolseley Hornet Supercharged Spl. 

Here we have a few of the million and one little finishing jobs as this wonderful project comes to a close. Although, as with any racing car, it will never be complete as upgrades and modificaions are likely to continue for quite a while (we already have a major upgrade planned as we speak).

 I am afraid these are less interesting "general" photos, but we have a few items here that have been made through the early summer. These include the steering column dash bracket completion, dip switch provision including a bell housing mounted bracket, and some general some pipe work. A thrust assembly supplement for an aged and slightly damaged aux drive unit.  Pressure plate bolt alteration to clear the bell housing...yes it did just kiss when we turned the engine over by hand after fitting the grearbox. We had checked this in the early stages but, we have since obtained another gearbox and didn't think anymore of it until fitting the unit! You can see particular attention to maintaining equal bolt weight to maintain balance. 

Battery location and support. Fluid fills and wiring finishing, securing and general tidy. You wouldn't expect so much wire for a simple electric system! 

As always, most fittings are one offs in-keeping with the period, but very time consuming.


1959 Turner 950 Chassis.

With the summer weather, it is nice to push the chassis out for work.
Most photos show suspension and chassis work. Some paint of bright areas may appear dull or dirty as we have Linseed oiled these to protect from our seaside air.
The gearbox and engine are only mock ups they are not the actual items. We have an A series  performance engine with Webers etc waiting in the wings.
We have wrapped the rear torsion bar in Waxoyl soaked hemp string to protect as this car will be used in all conditions.
These are early summer spring photos, more, up to date items will follow.


1946 Studebaker Champion
This is a more recent project, here we are preparing the engine for a full rebuild. Valve grinding is always a good initiation into the beginning of the build. Despite having been recut with new guides and valves, it is best to finish grind to be absolutely sure.
Here we are also removing pistons from rods, releasing the very clever self extracting cotter "wrist pin". Followed by a very thorough clean and brighten to inspect for any damage and to measure the alignment and the housing sizes ready for new bearings.
If these were for high speed or competition use, we would recommend crack testing, however for the type of work this engine will be doing these robust rods are unlikely to indicate any problems.
You can see in the photos that I have made a pair of Aluminium bungs that engage into a shoulder in the gudgeon pin to allow the piston assy to be firmly clamped without causing any load through the pistons or rods.


One cotter with damaged thread


Nose Art:
Something very unusual. I have been recreating the nose art on a very historic nose section of a Handley Page Victor K2. XL164 bomber / tanker aircraft. You can see the small sections of battered and faded paint that is the original, we are keeping that out of respect of her history, but we are reinstating by hand the totally missing areas including from the shoulders up!
It is said that five "Marham Bombers" were painted and named after each aircraft's chief engineer's wife or partner.
Saucy Sal can be seen at Bournemouth Aviation Museum http://www.aviation-museum.co.uk/ .

This is my biggest nose art project yet, it is very forgiving in this size.
The photos are a little distorted because of the barrel of the fuselage. She is more elegant in person!
Please click on them to see in a larger size.


Below: Prior to restoration of the nose art. Thank you to Bournemouth Aviation Museum for picture use.


Some Spring Work


 Wolseley Hornet Supercharged Spl.
 Here we are making a bracket to retain the steering column to the dashboard. This is an initial creation and test stage as shown by the pictures. I am sorry they are out of sequence.


A modern Lip seal provision and retention ring with 6 BA bolts to secure. Test fit above before trimming the bolts.


A convenient position for a cubby box made from Ash


Turner Engine and carburettor sorting out.


And some welding and more painting.


Although an older technique, here we are binding the Turner's torsion leaves in hemp and Waxoyl. 
After a coat of Waxoyl, we will bind another layer and incorporate a nice ZigZag pattern in the final pass. The waxoyl will calm the furry hemp!


Something a little different! Artwork restoration on a Victor Bomber / Tanker Exhibit "Saucy Sal".  As well as filling in the missing and faded areas, I had to recreate her head as the original was missing! If you click on the photo you will see she is quite pretty , although not yet finished.
 The aircraft served a very distinguished life, now under restoration in Bournemouth.
More to follow.